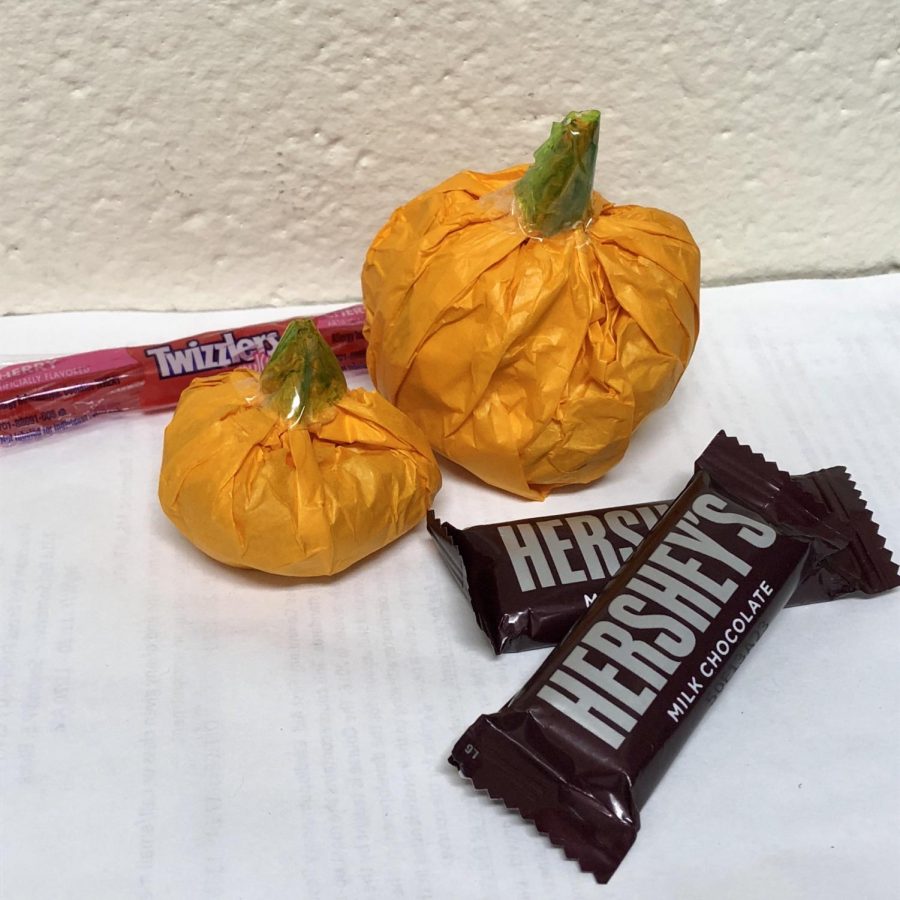
Crafting Corner: Tissue Paper Pumpkins
Halloween has come and gone but spooky season never ends.
It never gets old to go trick or treating (or buy an abundance of candy hoping to persuade first-years to join your club). So, here’s a fun activity to add a little pumpkin pizazz to your extra candy. Making “Tissue Paper Pumpkins” takes only five minutes and is the perfect activity to get you in the fall spirit. It also makes a great decorative piece for your room.
Supplies:
Orange tissue paper
Tape
Green Sharpie
Scissors
Pencil
I used One Little Project’s post as inspiration for this DIY. I modified it for the needs of college students (you’re welcome in advance). All of the supplies is pretty accessible, despite the tissue paper. I couldn’t find an alternative for that item, hence the name of this project. So, you might have to make a stop at Michael’s or Walmart.
If you can’t go out to buy orange colored tissue paper, I suggest saving and reusing left over tissue paper from a purchase and coloring it orange. You could also always grab some old Dickinsonian newspapers and color them orange!
Anyway, let’s begin. Start by drawing a circle on your tissue paper. Make sure you have two layers of tissue for this project. One Little Project’s example suggested tracing a 9” cake pan to create your circle. If you have one, great! I personally did not have a spare cake pan lying around my dorm.
Considering I can barely get through my Any 20 swipes every week, let alone have time to bake a cake in my (nonexistent) spare time, I don’t plan on investing in one anytime soon. Therefore, using my pencil, I free-hand sketched a circle onto my tissue paper.
Again, I guessed what 9” looks like and it ended up being roughly half the size of my tissue paper, though that estimation depends on the size of your personal supplies. I also made a mini pumpkin that required a 6” circle. While adorable, the biggest downsize is that you can only fit 1-2 pieces of candy inside.
Then, I cut out my circle. This sounds like a fool-proof step, but I had more difficulties than anticipated. At first, I thought I was cutting both layers but I ended up only cutting one, though this is a super simple fix.
Also, if your cutting skills are not up to par, no worries! We will be crumpling our tissue paper towards the end, so any imperfections will go unnoticed.
Now the fun part: candy! Place your candy in the center of your circle. It’s about finding the perfect ratio; too little and you have a sad, deflated pumpkin, but if you put too much candy, you may not be able to close your pumpkin shut.
Also, if you are buying candy specifically for this project, I suggest ones that are mini sized and not angular chocolate bars. It was very difficult to fit my solid, rectangular Hershey bar inside my spherical pumpkin. My mini, bite-sized 3 Musketeer candy, on the other hand, works perfectly!
Now, you will start shaping the tissue paper into your pumpkin. Place your tissue paper circle with the candy into the palm of your hand. Cup your hand so that the tissue paper has something to sit and fold into (this is what forms the sphere shape).
Then, crumple your tissue paper around your candy. Essentially, you don’t want to see your candy at all and want the tissue paper to become a ball with your candy as the center.
There should be tissue paper gathering towards the top. This section will be used to close and seal the pumpkin; thus, creating the stem. Pinch and twist the tissue paper as best you can to close the project.
Then, take your tape and wrap it around the top, pinched tissue paper to create your stem. This part involves some maneuvering. I suggest pre-cutting your tape so that you don’t have to try and cut it one handed (your other hand is occupied holding your pumpkin). I used two average sized pieces of tape. Make sure it’s securely taped on top so candy cannot escape.
I used clear, Scotch tape because that is what I already owned. If you have green tape, perhaps washy tape, I would suggest using that. In that case, you will skip the final step.
Finally, I used a green sharpie to color on top of my clear tape and finish off my pumpkin’s stem. I only had a light green sharpie, but that wasn’t a problem. I did two layers of coloring and achieved the color I desired.
Viola! You have a tissue paper pumpkin filled with candy. It’s almost too cute to eat! This project is perfect if you want to create a fall decor project on a budget. I personally am going to let my pumpkin sit on my desk for a few days before I rip it open and reclaim my candy. Or, this project is a really fun, casual gift idea.
Everyone loves receiving candy and there’s definitely no way anyone will refuse it when shaped as a pumpkin!


